
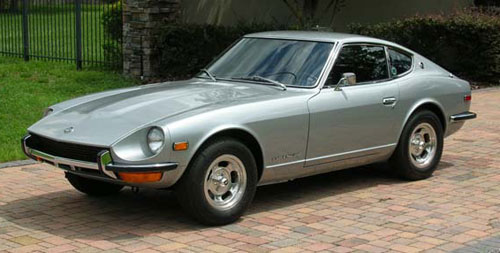
Datsun 240Z Restoration:
Getting It Back On The Road

Very sore today. I’ve been going full steam trying to get the Z back on the road before this Thursday, since it’s my son’s last day of 1st grade and I promised him I’d drive him to school in it.
The upshot is that after spending most of the last month “topside,” getting the engine running, these past few weeks have seen me mostly under the car, up to my elbows in dirty, cramped brake, clutch and driveline work.
In a nutshell, I’ve:
- Replaced the clutch master cylinder, slave cylinder and rubber line
- Replaced the brake master cylinder and rubber lines and rebuilt all four brakes
- Replaced the transmission’s rear oil seal
- Added new trans fluid (Red Line MT-90)
- Replaced the differential cover gasket
- Added new gear oil to the diff (Red Line 75W-90)
And now for some pictures:

These are all the parts that had to come off for me to be able replace the cover gasket on the diff. The axle shafts in particular were a bear to remove. More modern CV joints and circlips make life much easier.

The internals of the diff looked relatively unscathed after 40 years. However, to my recollection, there is a pronounced whine from the diff whilst driving, something that will be looked into further during the full restoration phase.

Interesting find: There is a (apparently non-OEM) baffle for the diff breather sandwiched in between two cover gaskets. It was a bit annoying to have to order another gasket, but I’m glad it’s there.

I despise drum brakes. Yes, I’ve heard all the arguments for how a disc conversion is expensive, and that my braking performance will likely actually decrease slightly, but to not have to deal with pulling off drums that are fused to the hub, or rebuild ornery wheel cylinders… I would pay quite a bit. And of course, there’s also the fact that discs just look better.
With any luck, I’ll have it on the road for a test drive tonight. Just need to bleed the clutch and brake systems and we’ll be good to go. Video (hopefully) forthcoming.
Update: (9:05 PM) The required brake bridge didn’t come in tonight, as promised. Frustrating. Won’t have a whole evening to tune it before Thursday, but…I’ll make the best of it. Disappointing.
Editor’s note: This post is Part 15 of an ongoing series chronicling my efforts toward the restoration of my 1972 Datsun 240Z, originally my father’s. Read the other installments here:
- Part 23: Gutting the Interior
- Part 22: The Teardown Begins
- Part 21: …And the Engine Comes Out
- Part 20: Treasure Hunting
- Part 19: Beginnings
- Part 18: VIN Discoveries
- Part 17: The Bad News
- Part 16: On The Road
- Part 14: It Lives!
- Part 13: Restoring the Fuel System, Part I
- Part 12: Meat on the Wheels
- Part 11: Inspiration (Sort Of)
- Part 10: Carbs’ Return
- Part 9: First Triad Z Club Meet
- Part 8: Wheel Work
- Part 7: Tactical Changes
- Part 6: Little Things
- Part 5: Coming Home
- Part 4: The Rollout
- Part 3: Confessions of a Poor Car Enthusiast
- Part 2: Opening the Tomb
- Part 1: Projecting Forward


